Archive for the ‘C’ Category

Uzebox – AVR Gaming console

UZEBOX

So lately I have been fiddling with Uzebox. It’s a game console from just a ATMega644 mcu and a AD725 (RGB-to-NTSC converter) chip. Thats the whole idea. The RGB signal is created by a manual 3:3:2 resistor based DAC, and audio is pure PWM signal.

The awesome part of this console is the “kernel”, written by Uze (Alec Bourque), which has several video modes available, and a 4 channel audio mixer, all done in interrupts, so that when you code stuff to this console, you don’t have to think about the clock cycles of your code, as the interrupt will always update the screen and audio output “behind the scenes”.

The project is now also supported well by a small but great community, that has helped Uzebox with more video modes, games, and even a realtime emulator!

I have made a few additions to the emulator (uzem), adding threading to split the SDL screen blitting from the MCU emulation in seperate threads, a funny RAM/Progmem visualizer, and a SD card FAT16 emulator. (The emulator already had SD card emulation, but I have added the FAT16 emulation)

You can buy yourself a Uzebox at Adafruit, or just download the emulator from the code.google.com repository.

Games and demos(with or without source code) can be downloaded from the wiki.

My additions can be found in the SVN repo.

DMX Light control system

Every year, I team up with raider.no to arrange a party in Hurdalen, or around the Oslo area. And one of the things that is important for us (especially me and William), is to create a cool opening show, using our own innovative technology. We don’t have a lot of money in the organization, so we tend to also develop stuff that already exists.

This year, we wanted to do the timing of the show entirely in our own system, as we weren’t satisfied with the Avolites Pearl systems own “show timing” system.

So we split up the task in two daemons and a GUI. The two daemons are written in C, and the GUI in Perl (using the Catalyst Framework).
The first deamon is the “DMX daemon”, which handles existing DMX data from the Pearl mixer as the rest of the night will be run from this board. This is transferred via network over the ArtNet protocol. It also listens for our own udp DMX-commands, which includes simple operations like, fade (linear), blink, subtract, add, etc. These functions allows external scripts and programs to send simple commands to control the lights. For example “fade channel 1 from 0 to 255 in 2 seconds”. Which would then automatically execute, without the client having do anything more. You can also group together a bunch of actions in a “transaction”, and then have it execute as soon as you send the “end transaction” command. The resulting DMX data is sent to the Enttec DMX dongle connected to this computer. The system is so lightweight, that there was no noticeable delay from using ArtNet->DMXDaemon->EnttecDongle over network, than using the direct DMX output from the board. The nice thing is that, if we want, the show daemon can forcibly stop all data from the Pearl mixer, or even alter the data using add/subtract/max/min commands.

The next daemon is the show daemon, this takes complete scripted shows from the database (created by the GUI), and converts them to commands to be sent to the DMX daemon. This daemon uses (lib)jackd2 to fire events at the exact time according to the sound file playing in a external program like Ardour, which sends timecodes via jackd. The show daemon has functions to group together effects that will be executed at specific timestamps.

Here’s a link to a overview of how we wired it all up for the show.

The whole system is kept open-source at github.

Variable initialization in C

I’m feel that I am starting to get the hold of C programming. But every now and then, I get these “ahaaa” moments, that I am a bit embarrassed about. One of these “aha”‘s I experienced today is how/when C handles initialization of variables where you don’t explicitly initialize them yourself.

Consider this code:

1
2
3
4
5
6
7
8
int var1;
 
int main(char **argv, int argc) {
  static int var2;
  int var3;
 
  return 0;
}

Here i deliberately did not initialize any of the variables to make an example. The first two variables will automatically be initialized with 0 before your main() function is executed. The last variable lives in the stack and will not be initialized unless you explicitly do it yourself. So it will probably have a ‘random’ value. Thats kind of handy to know about ;) I feel like this probably is one of the first things you usually learn about C, but I had totally missed this. Nice to know. Also if you use Valgrind to check your code, it can be very good at following uninitialized stack variables. It will actually follow uninitialized memory bit-wise.

First I thought the memory was initialized to 0 at compile-time, but after some reading, I learnt that the compiler records the amount of uninitialized memory for global and static variables, and stores the amount of data required in the BSS segment of the program. This way the executable will not grow in size in line with the amount of uninitialized data. For this reason some people call the BSS segment for the “Better Save Space” segment.

MAC-address based Telnet server in Linux

My previous post was about RouterOS Mac-Telnet application for Linux users where I talked about the MAC-Telnet client I created for Linux users.

Since then, I have both started porting it to OS X and to create a daemon version of MAC-Telnet, called “mactelnetd”. You can look at the different branches at github.com.

To use mactelnetd, install MAC-Telnet from the github link, using either the latest .deb file from the download section (if you are on Ubuntu or Debian), or download the sources and compile it yourself. You can find instructions for this on my previous post. you first need to edit the /etc/mactelnetd.users file. This file consists of the users and their respective passwords for logging into the server. I wish we wouldn’t have to write the passwords in plain text, but the authentication method used in the mac-telnet protocol demands that we know the actual password, unlike ssh/regular telnet, where the password can be stored as a hash sum.

The format of /etc/mactelnetd.users is like this:

# Users file for MAC-Telnetd
# Use existing usernames from your system
#
# Format:
#username:password
haakon:mypass

Here I have activated the user account haakon, with apssword “mypass”. It is important that the user names that you enter into this file is existing user names from your Linux machine. The mactelnetd daemon will check /etc/passwd for home directory, and what shell to spawn for the user, as any regular terminal server.

When you have created/modified this file to your wishes, you can start the server daemon:

$ sudo mactelnetd

If there were no error messages, it spawned successfully and you can watch it’s log entries via syslog.

$ tail -f /var/log/syslog
Dec 26 01:06:08 haakon-kontorpc mactelnetd[10183]: Bound to 0.0.0.0:20561
Dec 26 01:31:17 haakon-kontorpc mactelnetd[10183]: (28780) New connection from 0:c:42:3e:20:c2.
Dec 26 01:31:17 haakon-kontorpc mactelnetd[10391]: (28780) User haakon logged in.

Here you see the results of me logging into my Linux Desktop machine from a MikroTik Router using the RouterOS command “tool mac-telnet 1c:6f:65:2c:98:b7”

[admin@Holmenveien] > tool mac-telnet 1c:6f:65:2c:98:b7
Login: haakon
Password:
Trying 1C:6F:65:2C:98:B7...
Connected to 1C:6F:65:2C:98:B7
Linux haakon-kontorpc 2.6.35-23-generic-pae #41-Ubuntu SMP Wed Nov 24 10:35:46 UTC 2010 i686 GNU/Linux
Ubuntu 10.10
 
Welcome to Ubuntu!
* Documentation:  https://help.ubuntu.com/
 
haakon@haakon-kontorpc:~$ w
01:32:52 up 24 days, 22:48,  2 users,  load average: 0.53, 0.61, 0.57
USER     TTY      FROM              LOGIN@   IDLE   JCPU   PCPU WHAT
haakon   tty7     :0               01Dec10 24days 26:29m  3.17s gnome-session
haakon   pts/0    0:c:42:3e:20:c2  01:32    0.00s  0.15s  0.00s w

If you want to shut down the mactelnetd server, simply write “sudo killall mactelnetd” in your shell.

FUN TIP: If you want “fancy” terminal promt like RouterOS has, with syntax coloring on your Linux machine (logging in via console, xterm, ssh or mactelnet), you can install the shell “fish“, and then change your user settings to use it as the default shell by issuing:

$ sudo usermod --shell /usr/bin/fish myusername

NB: Be sure that the file /usr/bin/fish exists, and change “myusername” with your username, and remember to test logging into a second console, just to be sure you did this correctly, before logging out of your current terminal. To revert, set /bin/bash as your shell again, or what ever shell you previously used.

Here’s a direct link to the latest Ubuntu/Debian package at the time of writing:

mactelnet_0.2-1ubuntu1_i386.deb

RouterOS Mac-Telnet application for Linux users

Earlier, I wrote about a Wireshark plugin for dissecting Mac-Telnet packets. Now I have created an open source application for connecting to a RouterOS router via its MAC address from Linux without having to install Wine. At the time of writing the project is still in “alpha” stage. But it is fully functional. Though it will probably be rewritten soon. I feel that the second time you write the same application, it tends to be more robust and thought through.. The first time is more of a proof of concept, and I let myself do a lot of short-cuts, just to be able to see it working.

The source code can be found at github. Just find the “download source” link at the top of the page.

To compile it, simply untar it, and compile it with “make” .
Because it needs to alter the frame headers, it uses RAW sockets, which means that you will need root access to use this tool.

To find the MAC address of connected routers, try the included tool mndp. It might take up to 2 minutes to find all routers, since it is a passive tool that waits for the routers to broadcast their info on the network:

# ./mndp
Searching for MikroTik routers... Abort with CTRL+C.
  0:c:42:43:58:a5 HMG

HMG is my name of the found router, set in the Identity section of the router.

Here are some mac-telnet usage information:

# ./mactelnet --help
Usage: ./mactelnet <ifname> <MAC> <username> [password]
 
Parameters:
  ifname    Network interface that the RouterOS resides on. (ex: eth0)
  MAC       MAC-Address of the RouterOS device. Use mndp to discover them.
  username  Your username.
  password  Your password.

Tip: Log out using CTRL+D on your keyboard.

Usage example:

# sudo ./mactelnet eth0 0:c:42:43:58:a5 admin mysecretpass
Connecting to 0:c:42:43:58:a5...done
 
 
  MMM      MMM       KKK                          TTTTTTTTTTT      KKK
  MMMM    MMMM       KKK                          TTTTTTTTTTT      KKK
  MMM MMMM MMM  III  KKK  KKK  RRRRRR     OOOOOO      TTT     III  KKK  KKK
  MMM  MM  MMM  III  KKKKK     RRR  RRR  OOO  OOO     TTT     III  KKKKK
  MMM      MMM  III  KKK KKK   RRRRRR    OOO  OOO     TTT     III  KKK KKK
  MMM      MMM  III  KKK  KKK  RRR  RRR   OOOOOO      TTT     III  KKK  KKK
 
  MikroTik RouterOS 4.0 (c) 1999-2009       http://www.mikrotik.com/
 
 
[admin@HMG] >

[UPDATE]
Omni Flux sent me a patch that speeds up the MNDP discovery time by sending out a MNDP request before waiting for replies. Thanks!

He also informed me that his tests showed that you could send all the mac-telnet traffic to- and from- the broadcast address. This means that you would not need socket_raw (read: root privileges) capabillities to be able to send data to the router.

So the latest version of mactelnet, now also as a binary .deb package below, can be used without root privileges, unless you don’t want all data from your session to be broadcasted on your local network. You can optionally use the “old” method, where it uses the destination routers mac address as destination instead of broadcast.

Heres the latest “stable”: v0.1 version
Source tarball
Ubuntu/Debian binary package

Last commits on MAC-Telnet at GitHub

Dissecting Mikrotiks Mac-Telnet packets

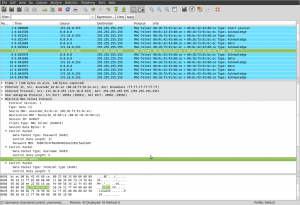
Screenshot of Mac-Telnet dissecter

Mac-Telnet traffic in Wireshark

I was searching on the Internet if there were any MAC-Telnet clients for linux/posix, since using terminal.exe in wine is problematic sometimes, as wine gives it access to only one of the NICs in your computer.

I didn’t find any clients, but I found this nice reverse engineering of the protocol, which interested me, because I’ve always wondered how it was made, just not enough to check myself. But this guy has done his homework and then some in reverse engineering of Mikrotiks protocol.

You can find his page here: http://www.omniflux.com/devel/

This gave me an Idea to create a MAC-Telnet client myself, and I started some testing with perl to check if I was able to send the correct packets to my mikrotik router. At first you might think; thats easy! All packets via the mac-telnet protocol uses UDP packets, with both source- and destintation port: 20561.

But you can’t send these packets with your normal socket wrapper library, because you need to set the mac-addresses in the network frame to something other than the source/destination IPs corresponding ARP entry. To go into details: When you send Mac-Telnet packets as a client, you need to send your packets going from your ip to ip 255.255.255.255, but with the router you want to telnet as the destination mac address in the ethernet frame. (even though the ip is set to 255.255.255.255).

To test this in perl, I used Net::RawIP from CPAN, which worked just like I wanted to. The only problem is that you need to have root access to be able to do raw packets.

Anyways, I looked at the packet I sent with my test script, and the response from the RouterBoard with Wireshark. Even though I got it to work, I felt I was having problems reading the packets very easily: Reading omniflux’s protocol description, and then looking at the hex dump of the packet. So I decided to make a dissector plugin for Wireshark (ethereal), so I could debug the packets easier.

Here is the finished source code for the Wireshark plugin (GPLv2): mactelnet.diff

Just patch this in from the root of the wireshark sources.

[Update: It is now added in the wireshark svn trunk]